Terraform “Reusable Modules”

Create reusable modules in Terraform to deploy resource in AWS. An example of two teams using the same code to deploy separate AWS resources.

In the previous examples, I’ve shown more and more complicated deployments of AWS infrastructure and resources. The method used in previous examples works great if I am the only person to use the code. Just me, myself, and I deploying architectural wonders into the cloud. Well, that is just not reality, now is it?

The reality is that we create technical solutions by working together as a team. After all, working together is where a team has advantages to form a better solution when we collaborate and share our knowledge and expertise.

This exercise will show continuous improvement (CI) elements by creating reusable modules and continuous development (CD) by deploying the modules.

The code discussed in this example is posted in my GitHub repository

What is discussed in this Post

Caveats & assumptions

Caveat: The VPC reusable module is simple, creating private and public subnets with only two availability zones in any region. It doesn’t accommodate choosing more than two availability zones, it doesn’t accommodate choices like if you want to disable or enable IPV6 or set up a VPN gateway, etc.

Caveat: Docker Website is also very simple. It is a simple Docker container that is a website developed for this demonstration. You can technically use your docker container or any generic website container.

Assumption: To keep costs down, we are using the latest NAT instance published by AWS. NAT Gateways in a free tier account will incur costs if left in the running state for more than an hour, so I opt to use NAT instances instead of NAT gateways to save a bit of change.

Assumption: You are interested in the methods to create modular code. This blog post will discuss in detail not just the how and the why of modular coding, but also I’m trying to express the logic behind some of the requirements as I understand them.

Reusable modules

Simply put, a “module” is a folder. We put some Terraform code into that folder, and Terraform understands the content of a folder as a “MODULE.” The folders (Terraform modules) separate our Code into logical groups.

Think of modules as putting the pieces together to make a complete solution.

In the chart above, we have an example of five different folders. Each folder represents a module, and each module contributes to a complete deployment solution.

We can have a developer publish the VPC module and Security Groups. Have another person develop and publish the Web Template, and yet another developer create the Auto Scaling Group (ASG) and Load Balancer (ALB) modules. Then finally, a deployment team pulls the different modules from a published location and deploys the modules to production.


We’ll start by understanding the use of reusable modules (dry code). As we progress in writing Infrastructure as Code, we need to share code between teams like production, development, and Quality Assurance environments. This exercise will create a “reusable module” for a VPC and another “reusable module” to create an EC2 instance as a website server.

We will then simulate a Development team using the reusable modules to deploy resources into a development environment. After deploying resources for the development team, we will simulate a Quality Assurance (QA) team using the same modules (with different variables) to deploy a QA environment. The Development Team and the QA team will use the same modules (dry code) to deploy different resources in the same region or regions using the same AWS account but different credentials or even launching from different accounts.

The Terraform method for reusable code is to use Terraform module source.

The source argument in module block tells Terraform where to find the source code for the desired child module. Terraform uses this during the module installation step terraform init to download the source code to a directory on a local disk so that it can be used by other Terraform commands.

HashiCorp Terrafrom

in this exercise, we will place our Terraform code into a shared location and, as per normal practice, refer to the shared location as the “source module.” We can create a “source module” in any folder. The folder can be your local drive or a source code management system (SCM) like GitHub, Artifactory, or Bitbucket. A “source module” can be any network folder in your local area network (LAN) or Wide Area Network (WAN), so long as you, the user, has permission to read and write to the network shared folder.

I believe the best place for reusable code is a source code management system (SCM) like GitHub, BitBucket, GitLab, or Artifactory. At the time of this writing, my personal preference is to use GitHub.

We create a reference to a source module by putting a statement in Terraform like the following (which becomes the module configuration block):

Remember that the module’s “name” can be any name you desire when declaring the module. It does not have to be the same or similar to the source code for the source module to work.

Why are we using S3 remote Terraform State and DynamoDB 

Let’s use an example of a three-tier application that is under development. The first tier is a front-end Web service for our customers. Another tier is the application layer that performs ERP1 services, and the third tier will hold the database (back-end services).

We have a developer (Developer-A) responsible for developing and releasing changes to our front-end web service. Another developer (Developer-B) is responsible for developing the ERP1 application service. Both developers have access to make changes in the development environment. Both developers can launch, create and destroy resources in the development environment.

Both developers perform most of their work offline and use the AWS Cloud developer’s environment on a limited basis because most of the development is performed offline and not in the cloud environments. Developer A is ready to test his changes and performs Terraform Init and Terraform Apply to create the environment. So the development environment is now running in AWS and operational.

On the very same day, Developer B will make a major change to the ERP application server. Developer B wants to move the ERP server to a different subnet. Developer B modifies his version of a reusable module, and then Developer B executes the change by performing Terraform Init and Terraform Apply, thus moving the ERP server to a different subnet. Suddenly Developer A, who is working in the same environment, observed major errors on the Front End servers that he had already deployed because developer B had moved the application servers; hence, Developer B’s change impacted developer A’s development test.

Developer B went into our reusable module after Developer A had already used the same module to launch the AWS resources. Terraform happily made the changes which caused Developer A to see unexpected failures. If we use “Terraform Remote state” in an AWS S3 bucket and DynamoDB to lock our remote state, Developer B would be prevented from executing changes to AWS resources after Developer A has locked the Terraform State. Developer B would then need to communicate and coordinate any necessary change with Developer A.

By putting a Lock on the S3 remote state, we can prevent team members from making a change that impacts AWS resources without coordination between members.

DynamoDB’s locking of Terraform State doesn’t prevent us from making a change to our resources, it simply prevents other team members from making unexpected changes after a resource is deployed.


OK, let’s get started and set up the folders

Let’s create our folder structure before getting started. The first folder, named “Modules,” will hold the reusable modules, and the second folder, named “Teams,” will be used by our team members. The third folder holds a few things to help us manage our Terraform state.

Reusable modules folder structure

You can place the “Modules” folder and the “Teams” folder anywhere. For example, you can put the “modules folder” and its content on a separate computer from the “Teams folder.”

For brevity, why don’t we keep it simple for now and place everything in a folder structure like the following:

reusable_modules_exercise
 └Modules
   └VPC
   └Docker_website
 └Teams
   └Quality_Assurance
   └Development
 └MGMT
   └S3_Bucket
     └create_S3_bucket
     └Dev_remote_state
     └QA_remote_state
     └Create_DynamoDB_Table
   └Bastion_Host

Creating the AWS S3 bucket, Terraform state file, and DynamoDB table

Before using an S3 bucket and Terraform remote state file. We should create the bucket and Terraform remote state file independently and, most importantly, create the DynamoDB for locking Terraform remote state before creating any AWS resources that utilize the Terraform remote state.

We will create one AWS S3 bucket. Two Terraform state files, one for our Development team and one for our Test team. And one DynamoDB table that keeps the data regarding locks put in place for our Terraform remote state.

Creating the S3 bucket

Change directory to the folder ~/reusable_modules_exercise/mgmt/S3_bucket/create_s3_bucket

S3_bucket.tf

Reminder! Be sure to change the name of the bucket into a “unique name” of your choice

After creating this file, perform terraform init, terraform validate, and terraform apply to create the S3 bucket.

A few things to consume about our “S3_bucket.tf”. The line  lifecycle {prevent_destroy = true} prevents someone from accidentally deleting an S3 bucket.

 resource "aws_s3_bucket_server_side_encryption_configuration" This block of code enables server-side encryption. You certainly want to read up on your choices regarding encryption choices to use either “Amazon S3-managed keys (SSE-S3)” or “AWS key management service key (SSE-KMS).” I recommend reading the Terraform registry and Amazon Docs. As you can see, I’m letting AWS create and manage the key for our bucket by configuring the block with the choice of “sse_algorithm.” Amazon S3-Managed Keys (SSE-S3).

 resource "aws_s3_bucket_versioning" "bucket_versioning" This code block establishes if you want to use versioning in the S3 bucket. Versioning allows reverting to a previous version of Terraform state from a disaster recovery standpoint, it makes sense to use versioning. When teams use reusable modules without a DyanamoDB lock, you most definitely want to version your code with a source code management system like GitHub. Nothing wrong with enabling it by default. You might never need to revert to a previous version of Terraform remote state UNTIL you need it, and boy, you’ll wish you had versioning in place when that happens. Especially in a production deployment, maybe not so much in a development environment.

 resource "aws_s3_bucket_public_access_block" You might see some examples applying this resource setting via Terraform. Personally, I recommend skipping this optional block of code for an S3 bucket. By default, Public Access is denied for all S3 buckets unless you specifically allow public access (For example – turning an S3 bucket into a static website). I recommend leaving it out, AWS by default denies public access, which is perfect for a Terraform Remote State S3 bucket.

Creating the Remote state files

Remote state for the development team

Change directory to the folder ~terraform/reusable_modules_exercise/mgmt/s3_bucket/Dev_remote_state

dev_remote_state.tf

After creating this file, perform terraform init, terraform validate, and terraform apply to create the remote state file for our development team.

Don’t worry if Terraform says that nothing happened. If this is the first time executing this code, it does, in fact, create the “tfstate” file.

The code should be in its own folder, separate from creating an S3 bucket. Because the bucket must also already exist to place the “tfstate” file in the bucket.


Remote state for the Test team

Change directory to the folder ~terraform /reusable_modules_exercise/mgmt/s3_bucket/QA_remote_state

test_remote_state.tf

After creating this file, perform terraform init, terraform validate, and terraform apply to create the remote state file for our QA team.

Creating the DyanmoDB database

Change directory to the folder ~terraform/reusable_modules_exercise/mgmt/s3_bucket/Create_DynamoDB_Table

Create_DynamoDB_table.tf

The secret to creating this DynamoDB table is in the “hash_key.” When Terraform is pointed to a DynamoDB table, it will place the Terraform remote state into DynamoDB’s NoSQL database using the HASH_KEY as the primary ID for each Terraform Remote State. Yes, that’s right, we need only ONE DyanamoDB table that can handle multiple Terraform states. We will be using the DynamoDB database twice in this exercise. Once the Development team with a unique “tfstate” file is placed into DyanamoDB, our QA team will have its own unique “tfstate” file in DynamoDB. Terraform will simply create a new unique “LockID” for each Terraform state file.

Once again, I recommend separating the code into its own folder from the above code. Primarily because we need only one Database for all our teams using the same DynamoDB. Development, Test, QA, and Production deployments can use the same DynamoDB database because each will have its own “tfstate” file and a unique LockID in the database.

Code for Reusable Modules

Reusable modules are “child modules” because when we execute terraform init , the reusable modules are downloaded into the calling directory (which becomes the “parent” module). There is a relationship between the parent module and the child module. The parent module uses the following:

When we initiate terraform init, Terraform knows where to get the child module because of the “Source” module configuration block (shown above). Terraform will download the reusable module from the source into the current directory and configure the downloaded module with values stipulated by the “variable =” as shown above.

The Terraform workflow is different from previous exercises. Here are a few pointers;

  • Remember the module that is doing all the work is the reusable module which is the “source (child) module” which is downloaded into the current directory.
  • The “Parent” module calls the “child module” (reusable module) and passes variables to the child module.
  • We are using Terraform Remote State, BUT there is a really big caveat as to how we use Terraform Remote State in this scenario;
    • In the previous exercises, we used “inputs” and “outputs” to Terraform Remote State. In this case, while we are still using outputs, but in this case, we are using Terraform State to lock our configuration and not so much to pass inputs and outputs to/from our remote state file.

Code that creates our reusable modules

So now that we have created our S3 bucket, the Terraform state file, and a DynamoDB table, we are ready to set up some code as a reusable module.

Change directory to ~/reusable_modules_exercise/modules

Now let’s create our first reusable module, the VPC. We will start with a terraform_remote_state S3 bucket configuration. It is important to use variables for the bucket name and even more important to use a variable for the key name. Why you might ask? Well, that’s a great question; let me explain. ☺︎

It is recommended that each team use a unique terraform state file. Terraform writes the state data to a remote data store, which can then be shared between all members of a team. We want to separate our team environments because they usually have different requirements and process. Also each team usually requires its own control of release and configuration management. Therefore each team will use a unique terraform state file.

Me

We are going to use a lot of variables. Since we are using the same reusable code for different teams, we will need a method to cause a change of configuration for AWS resources per each team’s requirements. Hence, we use variables for each team to have the ability to apply a variance to an AWS resource.

Examples of variance

Size – A development team might use a “t2.micro” size for an AWS EC2 resource, but our Production team needs to assign a larger type “t3.large” instance type.

Stage – We need to differentiate between development, QA, and production, so we’ll use a variable called “Stage.” Creating a tag called “Stage” and assigning an appropriate variable identifying the team that owns the new resource. We will take advantage of this in other modules by using a filter to identify resources managed by which team.

Region – Our teams might be in different regions, so we’ll enable deployments into different regions using the same code but setting a “Region” variable.

Variables are key! Defining what needs to be configured for the different teams is a very important element when planning the use of reusable code.

Using Variables in reusable modules

Let’s start with an understanding of the usage of variables.

  • Reusable modules may have variables declared and used only in the module.
  • Reusable modules will have variables declared in the parent module and passed to the reusable module. This is exactly how we create a variance in deploying a reusable module.
    • For example, a development team uses region (us-west-1), and the QA team uses region (us-east-1). We will create our variable in the reusable module, the parent module, and the parent module’s configuration block to accomplish the variance.
      • reusable module declares – variable “region” {}
      • parent module also declares – variable “region” {}
      • parent module assigns a value to the variable in the module’s configuration block. See below:

There is one more variable discussion. When we want to prevent sensitive information from being published on GitHub, we will move an assignment of a value into a private file like “terraform.tfvars”.

In the module configuration block below, we normally assign values to variables, in this case, “bucket” with a value “my-bucket-terraform-states.” However, I don’t want the general public to know the name of my S3 bucket. Instead, I assign a variable in the configuration block and input the value in a file named”terraform.tfvars” instead of the configuration block. We also set up a special file called “gitignore” to instruct GIT to ignore the file “terraform.tfvars” when pushing to GitHub. Hence, the bucket name will not be published on GitHub and thus becomes a privately assigned value.

For example, in the line of code (instance_type = var.instance_type) in the example above, we use a variable where we would normally assign a value.

With any module, a simple thing like creating a variable for “Instance_type” needs to be declared, assigned to a resource, and given a value.

But when using reusable modules, the variables declaration, assignment to a resource, and then giving the variable a value will be placed into at least three, possibly four, different files.

The first rule is to declare the variable in both the parent and child modules. We assign a value to the variable in a configuration block in the parent module.

TypeModuleFile
Declare variableParent Moduleteams/…/variables.tf
Declare variableReusable modulemodules/vpc/variables.tf
assign variable to a resourceReusable modulemodules/vpc/vpc.tf
Assign a value to the variableParent Module (Module configuration block)teams/…/vpc.tf

To summarize:

The parent module and the child module must both declare a variable that is going to be configured in the parent module and assigned to a resource in the child (reusable) module:
variable "instance_type" {}

The child (reusable) module will assign a variable to a resource:
instance_type = var.instance_type

Normally, the parent module then assigns a value to the variable in the parent module configuration block:

But when it’s sensitive information, we skip the above step and assign the value in Terraform’s environment file, “terraform.tfvars”.

Let’s pretend that “instance_type” is sensitive information, and we do not want the value of instance_type published to GitHub. So instead of assigning a value in the module’s configuration block, as shown above, we will pass the buck to “Terraform.tfvars.” We instead assign a variable once again in the configuration block and assign a value in “terraform.tfvars, as shown in the example below:

Then assign the value in the Terraform.tfvars file:
instance_type = "t2.micro"

So let’s start with the first reusable file

The first reusable module – will be an AWS Virtual Private Cloud (VPC) reusable module.

First, we must decide what is configurable when creating the VPC. Different teams will want some control over the VPC configuration. So what would they want to configure (variance):

  • We want the S3 remote state bucket, State key, bucket region, and DynamoDB assignment to be configurable, as we want each team to manage their own VPC and the VPC Remote State
  • We need a tag to identify which team the VPC belongs to and a tag as to who takes ownership of the VPC
  • We want the region to be configurable by our teams
  • We want the NAT instance to have configurable sizing as per Team requirements
  • We might want the SSH inbound CIDR block to change as our teams might be in different regions and networks. Therefore, we need the SSH inbound CIDR block (I call it SSH_location) to be configurable by our teams
  • We probably want a different EC2 Key pair per team, especially if they are in different regions. I’d go so far as to say that production should be managed from a different account, using different EC2 key pairs and unique IAM policies. So we need the EC2 key pair configurable with reusable code.

As per the above conversation, we must declare the following variables in the parent and child modules that allow different teams to apply their configuration (variance) to the reusable modules.

We will then assign a value to each variable in the parent module.

Remember: All folders are considered Modules in Terraform

So first, we create a “variables.tf’ file in ALL reusable (child) modules:
~/terraform/reusable_modules/modules/vpc/variables.tf
~/terraform/reusable_modules/modules/Docker_Website/variables.tf
and we’ll create the same variables file in ALL parent modules, we’ll create a variables file for the development team:
~/terraform/reusable_modules/team/development/variables.tf
and we’ll create the same file for the QA team:
~/terraform/reusable_modules/team/QA/variables.tf

Variables that are declared and configured only in the reusable module

Note: in a future version, I might try my hand at doing the same as some of the more famous community VPC modules where we can create a subnet per AZ and/or stipulate how many subnets, like two subnets vs. four subnets. For now, I have hard-coded into the VPC module

Note 2: We want to use our own VPC coding simply because we want to use NAT instances vs. NAT gateways. It’s not an option in any of the community modules.

VPC (reusable module)

Change directory to ~/terraform/reusable_modules_exercise/modules/vpc, and include the following files vpc.tf, variables.tf, security_groups.tg and outputs.tf (documented below and included in my GitHub repository)

variables.tf (in the reusable module)
Security_Groups.tf

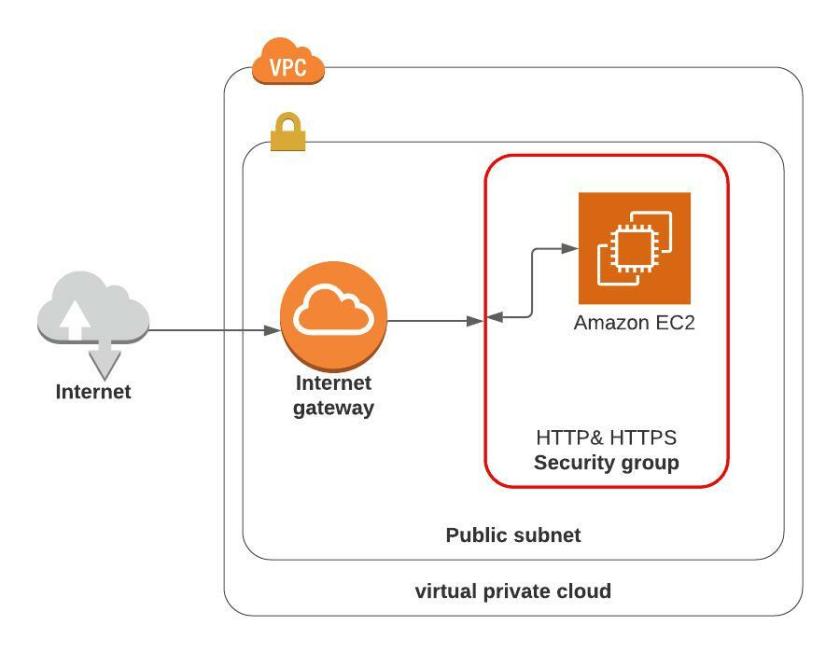
The following code establishes security groups for our (VPC) reusable module.

The security group for NAT instances allows HTTP and HTTPS only from the private subnets (thus allowing any instances in the private subnets to reach out to the internet for updates, patches, and download new software).

The security group for Docker Server allows HTTP and HTTPS from my Public IP address (ssh_location variable) and all traffic outbound to the internet. Allowing all traffic outbound to the internet is typical of a “Public Subnet.”

We are placing our Docker server in the public subnet, which is Ok for this exercise. So technically, we don’t need the NAT instances or the private subnets because we only place one EC2 Instance in one public subnet. Just for grins, I kept the private subnets.

vpc.tf (reusable module)
Outputs.tf

Docker_website (reusable module)

Our teams will use this module to deploy an AWS EC2 instance with scripts to install Docker and launch one Docker container that I created and published publicly in Docker Hub.

Several features to understand about this reusable module.

  • There is a dependency that the team’s VPC is already deployed
  • The module first communicates with AWS API to get data about the team’s VPC
    • For instance, data “aws_vpcs” “vpc” gets data for all VPCs in the region
    • Our data query to the API includes a filter, which will filter our query to return only the VPC with an environment value whose value is set by the parent module. For instance, if the parent module sets var.enviroment = development , then our query to the API will return only the ID of the VPC created by our development team.
  • You will notice that we have similar queries to find the team’s public subnet and the team’s security group for a web server.

Change directory to ~/terraform/reusable_modules_exercise/modules/Docker_website and create the following files: docker.tf, variables.tf, bootstrap_docker_web.sh, outputs.tf

docker.tf
variables.tf
bootstrap_docker_web.sh
outputs.tf

Creating code for the parent modules

Now comes the fun part. This code might appear similar to some community modules developed and published by different companies. Many community modules are complex in trying to solve all possible permutations someone might require of their module. For instance, many community VPC modules try to accommodate someone who may or may not require a VPN or a DirectLink connection to their VPC. Most published community modules allow a VPC to choose how many availability zones to deploy a subnet.

The VPC module in this example, the child module, and the parent module have simple requirements because my goal is to demonstrate how to create a module and only just a simple demonstration. Simplicity is the easiest method to reach a broader audience, right?

I already have a more complex demonstration planned for my next blog post, which will be a method for different teams to deploy an auto-scaled and load-balanced WordPress website using EFS for persistent storage that can use the reusable modules for the development team or a QA team etc. Soon to be published.

So first, let’s look at the variables configuring the reusable module AWS resources specifically for each team’s requirement.

  • The development team requires its own S3 bucket and remote state file, so it will declare the necessary variables and assign values unique to the development team
  • The same applies to an EC2-key pair, EC2 instance type, in-bound SSH CIDR block (SSH-Location), etc.
  • Some of the variables will be assigned a value in the parent modules configuration blog
  • Some sensitive information variables will assign a value in our “terraform.tfvars” file.

Let’s start with the Development team

Change directory to ~/terraform/reusable_modules_exercise/teams/development and add the following files.

variables.tf (development team)

The variables for our Development team

terraform.tfvars

With sensitive values, our Development team’s values will be declared in the file “terraform.tfvars. Teams can utilize the same S3 bucket for Terraform Remote State; it is the “state-key” that must be unique for each team.”

main.tf (parent module for development)

We are going to declare the VPC module and the Docker_website module. In this file (parent module), we will declare the source (path) of the child modules and the configuration to be applied to the child modules (by giving values to variables).

Note: module configuration block named “module “Docker_web” below has the line depends_on = [module.dev_vpc]. When putting together different modules like first the VPC, followed by creating our docker website, Terraform does not easily determine the dependencies. Without the “depends_on,” Terraform will try to deploy both modules simultaneously, and without the VPC already in place, our docker website will fail. This is easily fixed by the “depends_on” statement, which tells Terraform the VPC module must be completed before executing the “Docker_web” module.

Parent Module outputs

Yes, we have already declared outputs in the reusable module. But with reusable modules, if you want to see the outputs, we have to declare the outputs in our Parent Module as well. Just like variables, outputs have to be declared both in the child and parent modules.

outputs.tf

Create Quality Assurance Parent Module

Change directory to ~/terraform/reusable_modules_exercise/teams/quality_assurance and add the following files: main.tf, variables.tf, terraform.tfvars, output.tf.

Variables for the quality assurance team

You might notice the “variables.tf” file for the QA team is exactly the same as the development team’s “variables.tf”. That is because both teams are calling the same reusable modules. The magic happens when we assign a value to the variables

variables.tf
terraform.tfvars

Again, this is where our QA team will create variances required by their team. You’ll not that I give an example of our QA team using the “US-West-2” region instead of “Us-West-1” like the development team uses for their region. Also, note I have stipulated an instance type of “t2.micro” to demonstrate another variance between teams.

main.tf (parent configuration module for QA team)
outputs.tf

Deployment

Be sure to update the “terraform.tfvars” file to your settings. The GitHub repository does not have these files, so you will have to create a file for the development team and another for the QA team.

Please change the directory to ~/terraform/reusable_modules_exercise/teams/development

Perform the following terraform actions:

  • terraform init
  • terraform validate
  • terraform apply

Once completed, Terraform will have deployed our reusable code into AWS inside of the region specified by the settings configured in the parent module

Then change the directory to ~/terraform/reusable_modules_exercise/teams/quality_assurance

And perform the following actions:

  • terraform init
  • terraform validate
  • terraform apply

Once completed, Terraform will have deployed reusable cod for Quality Assurance. If you configured the Quality Assurance configuration with a different region, the same type of AWS resources is installed in a different region using the same reusable code.


Once completed with this exercise, feel free to remove all resources by issuing the following command in the terminal:

Change the directory to each team’s directory and perform the following destroy task. We don’t want to leave our EC2 instances running and forget about them.

AWS allows 750 hours of free tier EC2 hours. If you leave this exercise running, it has six EC2 instances (three for each team); left running it will use up your allowance of free EC2 hours in 5 days.

  • terraform destroy

This is not for production!

All public websites should have an application firewall between the Web Server and its internet connection, this exercise doesn’t create a firewall. So do not use this configuration for production

Most cloud deployments should have monitoring in place to detect and alert someone should an event occur to any resources that require remediation. this exercise does not include any monitoring

It is a good idea to remove All resources when you have completed this exercise so as not to incur costs

1 Enterprise resource planning (ERP) refers to a type of software that organizations use to manage day-to-day business activities such as accounting, procurement, project management, risk management and compliance, and supply chain operations.

Using Terraform to create SSL Certificate for an AWS Load Balancer

Load Balance Web Servers using SSL for My domain

AWS Certificate Manager is a service that lets you easily provision, manage, and deploy public and private Secure Sockets Layer/Transport Layer Security (SSL/TLS) certificates for use with AWS services and your internal connected resources. SSL/TLS certificates are used to secure network communications and establish the identity of websites over the Internet as well as resources on private networks. AWS Certificate Manager removes the time-consuming manual process of purchasing, uploading, and renewing SSL/TLS certificates.

from AWS Certificate Manager Docs

AWS Certificate Manager Pricing

Public SSL/TLS certificates provisioned through AWS Certificate Manager are free.

Overview

This exercise will build an auto-scaling group (ASG) of web servers. It is using almost the exact same code as my previous exercise.

The critical difference in this exercise is that we will add Terraform instructions to change our domain settings in AWS Route 53 and create a valid AWS SSL certificate using AWS Certificate Manager to enable SSL traffic to our website (HTTPS).

Prerequisites

  • You must have or purchase a domain for this exercise
    • It can be a domain purchased from any domain service, or you can buy a domain with AWS route 53
    • You must also ensure Route 53 is configured as your domain’s “Name Service” for the domain.
  • Terraform Installed
  • AWS account and AWS CLI installed and configured

The Code

Please clone or fork the code from my previous exercise from the GitHub repository.

Make a directory called Terraform, and be sure to change the directory to Terraform. On a Mac (cd ~/terraform). Then clone or fork my repository into the Terraform directory. You should now have a directory “ALB_ASG_Website_using_NAT_instances,” so let’s change directories into that directory.

Now we are going to add a file called “Route53.tf” using our favorite editor (in my case, “Visual Studio Code.”

Be sure to change <your domain> into the exact domain registered in Route 53, for example, “example.com.” If you want to use something like “www.example.com,” it must already be registered exactly as “www.example.com” in Route 53. Also, be sure to get the “Zone ID” of your domain from Route 53 and replace <zone id of your domain> within the above “route53.tf” code.

That is it; the above code will automatically create a certificate in AWS Certificate Manager, the code will automatically add the neccesary DNS entry for the certificate, and will automatically validate the certificate.

Well Ok, one more change to be made

While researching how to use Terraform to automate adding an SSL certificate for our Load Balancer, every example missed a critical component to get this working. I lost a few hours troubleshooting, then banged my head on the desk because of the apparent failure to change the ALB listener to accept HTTPS. I suppose the writers assumed that everyone knows an ALB listener has to change if we use HTTPS traffic instead of HTTP traffic. However, that tidbit of information wasn’t included in any articles I found on the internet. Oh well, onward and upwards!

Change the “alb_listener.tf file

Delete “alb_listener.tf” and we’ll add a new “alb_listener.tf”.

Our new listener instructions will forward HTTPS traffic to our load balancer. The code will also automatically redirect any HTTP traffic to HTTPS, thus forcing all traffic to be protected by an SSL transport.


The resources are free only if you don’t leave them running! There is a limit of EC2 hours allowed per month!

This is not for production!

All public websites should have an application firewall between the Web Server and its internet connection, this exercise doesn’t create the application firewall. So do not use this configuration for production

All websites should have monitoring and a method to scrape log events to detect and alert for potential problems with the deployment.

This exercise uses resources compatible with the AWS Free Tier plan. It does not have sufficient compute sizing to support a production workload.

It is a good idea to remove All resources when you have completed this exercise so as not to incur costs

Terraform – Scalable WordPress in AWS, using an ALB, ASG, and EFS

Using Terraform to deploy an auto-scaled WordPress site in AWS, with an application load balancer, while using EFS as storage for WordPress front end servers

Load balanced and Auto-Scaled WordPress deployment

This exercise will build an auto-scaled WordPress solution. While using EFS as the persistent storage solution. An auto-scaled front end can expand the number of front-end servers to handle growth in the number of users during peak hours. We also need a load-balancer that automatically distributes users amongst front-end servers to accommodate load distribution.

Ideally, we should use a scaling solution based on demand. I could write scaling an ASG based on demand, but demonstrating compliance by increasing client demand (representing peak load), could incur a substantial cost, and I’m trying to keep my exercises to be “compliant with a Free Tier plan.” Soooo, simply using an AWS ASG with desired capacity will be the solution for today.

Ideally, we should also use RDS for our database, which can scale based on demand. Using one MariaDB server that does not scale to user load kind of defeats the purpose of a scalable architecture. However, I’ve written this exercise to demonstrate deploying scaling WordPress front-end servers with an EFS shared file service and not so much as an ideal production architecture. Soooo, one MariaDB that is free tier compliant is our plan for today.

Why are we using EFS?

When scaling more than one WordPress front-end server, we’ll need a method to keep track of users amongst the front-end servers. We need storage common to all front-end servers to ensure each auto-scaled WordPress server is aware of user settings, activity, and configuration. AWS provides a shared file storage system called Elastic File Services (EFS). EFS is a serverless file storage system. EFS is compliant with NFS versions 4.0 and 4.1. Therefore, the latest versions of Amazon Linux, Red Hat, CentOS, and MAC operating systems are capable of using EFS as an NFS server. Amazon EC2 and other AWS compute instances running in multiple Availability Zones within the same AWS Region can access the file system so that many users can access and share a common data source.

Each front-end server using EFS has access to shared storage, allowing each server to have all user settings, configuration, and activity information.

Docker

We will be using Docker containers for our WordPress and MariaDB servers. The previous WordPress exercise used Ansible to configure servers with WordPress and MariaDB. But we are using auto-scaling, so I would like a method to deploy WordPress quickly rather than scripts or playbooks in this exercise—Docker to the rescue.

This exercise will be using official Docker images “WordPress” and “MariaDB.”

Terraform

We will be using Terraform to construct our AWS resources. Our Terraform code will build a new VPC, two public subnets, two private subnets, and the associative routing and security groups. Terraform will also construct our ALB, ASG, EC2, and EFS resources.

Requirements

  • Must have an AWS account
  • Install AWS CLIConfigure AWS CLIInstall Terraform
  • An EC2 Key Pair for AWS CLI (for connecting using SSH protocol)
  • AWS Administrator account or an account with the following permissions:
    • create VPC, subnets, routing, and security groups
    • create EC2 Instances and manage EC2 resources
    • create auto-scaling groups and load balancers
    • create and manage EFS and EFS mount points

GitHub Repository

https://github.com/surfingjoe/Wordpress-deployment-into-AWS-with-EFS-ALB-ASG-and-Docker

Building our Scaled WordPress Solution

vpc.tf

vpc_variables.tf

Security

The load balancer security group will only allow HTTP inbound traffic from my public IP address (in this exercise) at the time of this writing. I will possibly alter this exercise to include the configuration of a domain using Route 53 and a certificate for that domain, such that we can use HTTPS encrypted traffic instead of HTTP traffic. Using a certificate incurs costs because a Route 53 certificate for a domain is not included in a free tier plan. Therefore, I might write managing Route 53 using Terraform as an optional configuration later.

The WordPress Security group will only allow HTTP inbound traffic from the ALB security group and SSH only from the Controller security group.

The MySQL group will only allow MySQL protocol from the WordPress security group and SSH protocol from the Controller security group.

The optional Controller will only allow SSH inbound from My Public IP address.

security_groups.tf

efs.tf

We are writing the Terraform code to create a general-purpose EFS deployment. You’ll note that I’m using a variable called “nickname” to create a unique EFS name. We are using “general purpose” performance and “bursting” throughput mode to stay within free tier plans and not incur costs. You’ll notice that we are creating a mount point in each private subnet so that our EC2 instances can make NFS mounts to an AWS EFS service.

wordpress.tf

The method of creating an auto-scaled WordPress deployment uses the same kind of Terraform code found in my previous exercise. If you would like to see more discussions about key attributes, and decisions to make about Terraform coding of an Auto Scaling Group please refer to my previous article.

Notice that I added a dependency on MariaDB in the code. It is not required, it will work with or without this dependency, but I like the idea of telling Terraform that I want our database to be active before creating WordPress.

Notice that we assign variables for EFS ID, dbhost, database name, the admin password, and the root password in the launch template.

vars.tf

This covers the variables needed for WordPress and MariaDB servers.

bootstrap_wordpress.tpl

This Terraform code will be used to configure each WordPress server with Docker and launch the WordPress Docker container with associative variables to configure EFS ID, dbhost, database name, and admin password, and root password.

mariadb.tf

Notice that we are once again passing variables to our bootstrap by using a launch template.

bootstrap_mariadb.tpl

alb.tf

alb_target.tf

output.tf

terraform.tfvars

This file will be used to assign values to our variables. I have dummy values placed in the code below, of course, you will want to change the values.

Deploy our Resources using Terraform

Be sure to edit the variables in terraform.tfvars (currently, it has bogus values)

If you are placing this into any other region than us-west-1, you will have to change the AMI ID for the NAT instances in the file “vpc.tf”.

In your terminal, go to the VPC folder and execute the following commands:

  1. Terraform init
  2. terraform validate
  3. Terraform apply

Once the deployment is successful, the terminal will output something like the following output:

Copy the lb_dns_name, without the quotes, and paste the DNS name into any browser. If you have followed along and placed all of the code correctly, you should see something like the following:

Screen Shot

Notice Sometimes servers in an ASG take a few minutes to configure. Wait a couple of minutes if you get an error from our website and try again.

Open up your AWS Management Console, and go to the EC2 dashboard. Be sure to configure your EC2 dashboard to show tag columns with a tag value “Name”. A great way to identify your resources is using TAGS!!

If you have configured the dashboard to display the tag column "Names" in your EC2 dashboard, you should quickly be able to see one instance with the tag name "Test-MariaDB" and "Test-NAT2" and TWO servers with the Tag Name "Wordpress_ASG".

As an experiment, perhaps you would like to expand the number of Web servers. We can manually expand the number of desired capacity, and the Auto Scaling Group will automatically scale up or down the number of servers based on your command to change desired capacity.

The AWS CLI command is as follows:

Where ASG_Name in the command line above will be the terminals output of lb_dns_name (without the quotes of course). If you successfully executed the command line in your terminal, you should eventually see in the EC2 dashboard FOUR instances with the tag name “WordPress_ASG”. It does take a few minutes to execute the change. Demonstrating our ability to manually change the number of servers to four instead of two.

Now, go to your EC2 dashboard. Select one of the “WordPress_ASG” instances and select the drop-down box “Instance state”, then select “Stop Instance”. Your Instance will stop and what should happen, is the Auto Scaling Group and Load Balancer health checks will see that one of the instances is no longer working. The Auto Scaling Group will automatically take it out of service and create a new instance.

Now go to the Auto Scaling Groups panel (find this in the EC2 dashboard, left-hand pane under “Auto Scaling”. Click on the tab “Activity”. You should in a few minutes see an activity announcing:

“an instance was taken out of service in response to an EC2 health check indicating it has been terminated or stopped.”

The next activity will be to start a new instance. How about that! Working just like we designed the ASG to do for us. The ASG is automatically keeping our desired state of servers in a healthy state by creating new instances if one becomes unhealthy.


Once completed with this exercise, feel free to remove all resources by issuing the following command in the terminal:

  • terraform destroy

This is not for production!

All public websites should have security protection with a firewall (not just a security group). Since this is just an exercise, you can you in AWS free tier account, I do recommend the use of this configuration for production.

Most cloud deployments should have monitoring in place to detect and alert someone should an event occur to any resources that require remediation. this exercise does not include any monitoring

It is a good idea to remove All resources when you have completed this exercise so as not to incur costs

AWS Auto-Scaling Groups

Deploy an Auto Scale Group and Application Load Balancer in AWS

AWS no longer provides a NAT AMI. This exercise is based on utilizing AWS NAT AMIs. Therefore, at this time, this exercise will not work.

Application Load Balancer

This exercise will demonstrate using Terraform to deploy an AWS Auto Scaling Group and an application load balancer.

A simple website that shows EC2 Instance

I have created a bit of code that is a simple HTML page that will display some information about the AWS EC2 instance that is the host server of the web page. When you connect to our load balancer, the load balancer will route the end user to one of the EC2 Instances within the auto-scaling group. The web page display will show you the EC2 server details. When closing the web page and reconnecting to the load balancer, you will most likely see different host details, proving the load balancer connects to different servers.

The web page will look something like the following:

ALB – Application Load Balancer

A bit of information on AWS load balancers first:

Classic Load BalancerLayer 4/7 (HTTP/TCP/SSL traffic)
Network Load BalancerLayer 4 (TLS/TCP/UDP traffic)
Application Load BalancerLayer 7 (HTTP/HTTPS traffic)

Classic Load Balancer (CLB) – AWS recommends that you do not use their classic load balancer. The classic load balancer will eventually be deprecated.

Network Load Balancer (NLB) – The network load balancer works at layers 3 & 4 (network and transport layers). The NLB only cares about TLS, TCP, or UDP traffic and port numbers. The network load balancer just forward requests, whereas the application load balancer examines the contents of the HTTP request header to determine where to route the request. This is the distribution of traffic based on network variables, such as IP address and destination ports.

It is layer 4 (TCP) and below and is not designed to take into consideration anything at the application layer such as content type, cookie data, custom headers, user location, or the application behavior.

Application Load Balancer (ALB) – The application load balancer is the distribution of requests based on multiple variables, from the network layer to the application layer. The ALB can route HTTP and HTTPS traffic based on host or path-based rules. Like an NLB, each Target can be on different ports.

The NLB bases its route decisions solely on network and TCP-layer variables and has no awareness of the application. Generally, a network load balancer will determine “availability” based on the ability of a server to respond to ICMP ping or to complete the three-way TCP handshake correctly. Whereas, an application load balancer goes much deeper and can determine availability based on a successful HTTP GET of a particular page and the verification that the content is as expected based on the input parameters.

ASG – Auto Scaling Group

The auto-scaled web servers can automatically scale up or down according to load on the servers using an Auto-Scaling Group (ASG). However, this is a demonstration and not written for production deployments, so this code does not provide scaling servers based on demand, and instead, the code is written to provide scaling based on desired capacity.

I also have some code about using Terraform to deploy a Load Balanced WordPress Server with ASG and EFS as the persistent storage. That will probably be my next post.

This code can be found in my GitHub Repository


Features

Application Load Balancer – to distribute load amongst more than one server
Auto Scaling Group – with launch template and ELB health check
Simple Web servers – That will display EC2 instance data like Region, ID, and IP address
Using Terraform to deploy infrastructure as code into the AWS cloud

All resources created in this exercise are compliant with an AWS Free Tier Plan

The resources are free only if you don’t leave them running! There is a limit of EC2 hours allowed per month!

You might incur a charge if you leave the Application Load Balancer running for very long. I usually spin this up, prove that it works for about 10 minutes, then run “Terraform Destroy” to ensure I’ve accomplished this exercise for free.

This exercise will perform the following tasks:

  • Create a VPC with two public and two private subnets
  • Create NAT instances instead of a NAT Gateway, security groups and network routing
  • Create an Auto Scaling Group with a launch template
    • The Auto Scaling Group will create EC2 instances running Apache Webpage
      • I created a webpage displaying EC2 ID, EC2 hostname, Region, and private IP address. It will demonstrate which EC2 server you connect to via the load balancer by showing its unique IP address.
  • Create an Application Load Balancer that automatically registers the EC2 servers created by the Auto Scaling Group

Requirements

So let’s get started

In previous exercises, I demonstrated Terraform using modular code. In this exercise, the code will not be modular. All of the code will be placed in one folder.

So first, create your folder to place our code, a folder named “ALB-Website,” perhaps?

Building the VPC

You do not need to create a “Terraform remote state” for this exercise. However, as a best practice, I use an S3 bucket to hold “Terraform’s remote state.” And I will write code that provides output data such that if I need a jump server to troubleshoot an EC2 server in the private network, I can use my modular code to deploy a server I call “the Controller (jump server).”

vpc.tf

variables.tf

In the “variables.tf” file, we usually declar a default value to each variable. With this exercise, though, I’m creating a “terraform.tfvars” file. This allows us to add “terraform.tfvars” into our gitignore. A “gitignore” file controls GIT publishing to GitHub, by providin a list of files that informs GITl not be push the list of files in GitHub. The reason we do this is so that some values are not published to the public. By adding “terraform.tfvars” as part of the list in “.gitignore” file, we are informing GIT not to publish the file “terraform.tfvars” This allows us to safely assign values to our variables in “terraform.tfvars” file, like “my public IP address”, I really don’t want to my public IP address to be available to the public in GITHUB.

Terraform will by default look for a “terraform.tfvars” file in your folder. When declared variables do not include a default assignment (as is the case above, the variables are not assigned a default value.”

terraform.tfvars

security_groups.tf

bootstrap_nat.sh

Lines 24-33, queries AWS API to retrieve the latest image for an EC2 instance that is configured as a NAT Server. You will notice that I was getting the instance manually and hardcoding the AMI ID (using the method in the following paragraph). Then I realized that all I have to do is query AWS API for the latest AWS NAT instance AMI ID.

Note: How to manually get an AMI Instance ID for a AWS NAT server:
To find a “NAT AMI” for your AWS region, open the AWS Management Console. Go to the EC2 services. Select the AWS region of your choice in the Menu Bar. In the left-hand panel, find “AMIs” and click on the Amazon Machine Images (AMIs) panel. Select “Public Images” and filter on “amzn-ami-vpc-nat,” then find the most recent creation date and copy the AMI ID to use as your NAT AMI image for your selected region.


Creating the Auto-Scaling Group

One of the early decisions on using an Auto-Scaling Group (ASG) is how the ASG will determine “Load” to scale up or scale down according to a load on our application. I’m not going to write about the different health checks used to determine “Load” on our application in this exercise. That will be a post to write at a later date. Suffice it to say that I’ve selected “Elastic Load Balancing health checks” to check whether the load balancer reports an instance is healthy, confirming whether the instance is available to handle requests to our website.

Building the Auto Scaling Group Code

First, we need to declare to Terraform that we are creating an ASG resource and give our ASG a name.

Then declare the health check and parameters of our health check.

You’ll notice we’ve stated the health check type as “ELB” and provided the ALB target group name and ARN (find the ALB target group Terraform code below). We have also selected 300 seconds (5 minutes) for a grace period. And finally, “force_delete = true”. We are telling AWS that if any of our website servers are unhealthy for more than 5 minutes, delete the server, which then causes ASG to build another server to meet our desired capacity.

Our next step is to declare ASG sizing by stating the minimum, maximum, and desired number of servers.

Next and perhaps the most essential part of our ASG code is to declare if we are using a launch configuration or a launch template. We are going to use a launch template. Amazon Web Services recommends the use of launch templates but still supports (at the time of this writing) launch configurations.

We need to inform Terraform which launch template to use. We’ll use the “latest” parameter in this case as we have only one template version. Specifying a different version of our template is useful for Blue/Green deployments as an example.

Now, let’s put all of this together.

asg.tf

Building the Launch Template

I always throw in a bit of code to obtain the latest data for an AMI (in this case, Ubuntu vs. Amazon Linux). This sets up the ability for Terraform to query AWS API for data regarding the latest regional AMI image to use in a Launch template.

We first declare the type of resource and the resource name.

Then we declare the image ID, instance type, lifecycle rule, and security groups. Note the usage of “data.aws_ssm_parameter” obtaining the AMI by telling Terraform to query AWS API for ssm_parameters for AMI ID. The EC2 key pair is not required in the launch template; however, I always include the EC2 key name so that I can SSH into the servers in case of the need to troubleshoot the deployment.

We, of course, need to configure our servers

We’ll be using launch templates to configure our servers. For ASG the configuration code is required to be encrypted. So in this example, we add a line that tells Terraform to encode with Base64 and render a template file with the following line:

Next up is the reference to a template file. We are using a file with an extension “TPL.” A bootstrap.tpl appears the same as creating a simple shell command like bootstrap.sh file. The contents look the same, and the difference is how Terraform handles the file in a launch template. Using the extension “.tpl” will allow us to pass external variables into the script (which I will demonstrate in my next exercise).

We need an IAM policy for our server

I have created some code to create an HTML page for our auto-scaled Apache Web Servers. The code will allow our Web server to show information about the host server, specifically the EC2 details. The launched server web page is just a few lines that display EC2 attributes. The HTML will show the region, the AMI ID, the server’s hostname, and the IP address. Seeing host server information will demonstrate which server our browser has been connected to via our load balancer.

So first, let’s create the IAM policy for our servers that enable our servers to describe the EC2 host details. I have two JSON files. One for creating a role that allows our servers to assume a role that will enable our EC2 to use the service “ec2.amazonaws.com”. The second JSON file creates the IAM policy, allowing the action to “ec2:Describe*”. Our Terraform code below creates the role, the policy, and the profile of our EC2 servers.

Now let’s put this all together (asg.tf)


Create the Application Load Balancer (ALB)

To build our application load balancer, we need to create several key elements:

  • ALB
  • ALB listener
  • Target

ALB

The Terraform code to create an Application Load Balancer requires several key components:

  • Resource type and name
    • resource “aws_lb” “website-alb”
  • Type of load balancer(the load balancer will be an application load balancer in this exercise)
    • “load_balancer_type = “application”
  • Name of the Load Balancer in AWS, this must be a unique name so we have a random string generator in our code. We’ll append the string to the ALB name
  • Public or Private load balancer(internal vs. external load balancer)
    • “internal = false” (so it will be publicly addressable from the internet)
  • Subnets to locate our load balancer(since this will be a public-facing load balancer, Terraform will place the load balancer into our public subnets)
    • “subnets = [aws_subnet.public-1.id, aws_subnet.public-2.id]”
  • Declare the security group or groups for our load balancer

Alb.tf

ALB Listener

Key components of our listener:

  • resource type and name
    • resource “aws_lb_listener” “website-alb-listener”
  • Make reference to which ALB is using this “listener” setup
    • “load_balancer_arn = aws_lb.website-alb.arn”
  • Specify port and protocol
  • Default action (forward, redirect, fixed response, and/or authenticate)
    • Some of these actions can be combined, for example, forward and authenticate. This exercise will be using a simple webpage, so we will be simply forwarding it to our Web servers
    • We will use the action “forward” and set stickiness to false. Stickiness is when our ALB sends clients to the same server in the auto-scaling group in case the client gets disconnected. Since this is a simple demonstration, we don’t care which server a user is connected to when hitting refresh or reconnecting to our servers.

alb_listener.tf

The ALB target

When you create a target group, you specify its target type, which determines the type of target you specify when registering targets with this target group. After you create a target group, you cannot change its target type.

The following are the possible target types:

  • Instance (The targets are specified by instance ID)
  • IP (The targets are IP addresses)
  • Lambda (The target is a Lambda function)
  • Use the attachment function (in our case to an Auto-scaling Group ARN)

We could just put a couple of servers placed in one or more availability zones and list the Instance IDs or the IP addresses of those servers. Or, we could simply list the CIDR blocks of one or more private subnets, and the target would be any server in the private subnet(s). You could do this, but in our exercise, we want to use an auto-scaling group (ASG) and have the ALB health checks work with the ASG to rebuild servers if they become unhealthy. Therefore we do not want to point at IP addresses or instance IDs.

alb_target.tf

output.tf

Deploy our Resources using Terraform

Be sure to edit the variables in terraform.tfvars (currently, it has bogus values)

If you are placing this into any other region than us-west-1, you will have to change the AMI ID for the NAT instances in the file “vpc.tf”.

In your terminal, go to the VPC folder and execute the following commands:

  1. Terraform init
  2. terraform validate
  3. Terraform apply

Once the deployment is successful, the terminal will output something like the following output:

Copy the lb_dns_name, without the quotes, and paste the DNS name into any browser. If you have followed along and placed all of the code correctly, you should see something like the following:

Screen Shot

Notice Sometimes servers in an ASG take a few minutes to configure. Wait a couple of minutes if you get an error from our website and try again.

Open up your AWS Management Console, and go to the EC2 dashboard. Configure your EC2 dashboard to show tag columns with a tag value “Name.” A great way to identify your resources is by using TAGS!!

If you have configured the dashboard to display the tag column "Names" in your EC2 dashboard, you should quickly be able to see TWO NAT instances with the tag name "Test-NAT1" and "Test-NAT2" and TWO servers with the Tag Name "Website_ASG".

As an experiment, perhaps you would like to expand the number of Web servers. We can manually expand the number of desired capacity, and the Auto Scaling Group will automatically scale up or down the number of servers based on your command to change desired capacity.

The AWS CLI command is as follows:

Where ASG_Name in the command line above will be the terminals output of lb_dns_name (without the quotes, of course). If you successfully execute the command line in your terminal, you should eventually see in the EC2 dashboard four instances with the tag name “Website_ASG.” Demonstrating our ability to manually change the number of servers to four instead of two.

Once completed with this exercise, feel free to remove all resources by issuing the following command in the terminal:

  • terraform destroy

This is not for production!

All public websites should have an application firewall in between the Web Server and its internet connection, this exercise doesn’t create the application firewall. So do not use this configuration for production

All websites should have monitoring and a method to scrape log events to detect and alert for potential problems with the deployment.

This exercise uses resources compatible with the AWS Free Tier plan. It does not have sufficient compute sizing to support a production workload.

It is a good idea to remove All resources when you have completed this exercise so as not to incur costs

AWS Classic Load balancer

Using Infrastructure as Code with Terraform to create an AWS Load-balanced website

OOPS: Things Change. The code in Github was completely operational. Now it doesn’t work. It was based on Amazon NAT instances that are no longer available.

All of the Terraform code for this exercise is in Github repository

Features

  • AWS Classic Load Balancer
  • VPC using NAT instances instead of NAT gateways
  • Docker Containers running on EC2 instances

This exercise creates a load-balanced website (similar to the previous exercise) but with essential differences (NAT Instances instead of NAT gateway and using Docker container instead of a custom AMI as a web server).

  • AWS as a cloud provider
  • Compliant with the Free Tier plan
  • Using Terraform to create the deployment Infrastructure as Code
  • The ability to provision resources into AWS using “modular code.”
  • Four Web Servers behind a Classic load balancer
  • Ability to launch or destroy bastion host (jump server) only when required
    • Can add/remove bastion host (jump server) at any time without impact to other resources (Bastion Hosts – Provides administrators SSH access to servers located in a private network)

Difference – NAT Instance instead of NAT gateway

One of the differences between this code and the code sample in the previous exercise is that we’ll use NAT instances instead of a NAT gateway. A NAT gateway incurs costs even when using AWS under a free tier plan. It might only be a dollar or two per day. Still, it is a cost. So just for grins, I’ve created a VPC that uses AWS NAT instances to save a couple of dollars. A NAT instance does not compare to the performance of AWS NAT Gateways, so probably not a good solution for production. Considering we are simply running test environments, a NAT instance that performs a bit slower, and saves a few dollars, is fine with me!

Docker-based website

In the previous exercise, we used a custom AMI saved into our EC2 AMI library. A custom-built AMI works well because it allows us to customize an EC2 instance with our application and configuration and save it as a dedicated AMI image in our AWS account. A custom AMI enables greater control from a release management standpoint because our team has control of the composition of an AMI image.

However, creating a custom AMI and then saving an AMI into our EC2 library produces costs even when using a Free Tier plan. While it is great to use a custom AMI, it’s also essential to save money when we are simply studying AWS deployments within a Free Tier plan.

Docker to the rescue. We can create a custom docker container with our specific application and/or configuration like a custom AMI.

We will be using a boot script to install Docker and launch a Docker container, saving costs by not using a custom AMI image.

I’ve created a few websites (to use as docker containers). These containers utilize website templates that are free to use under a Creative Commons license. We’ll use one of my docker containers in this exercise with the intent to eventually jump into using docker containers in ECS and EKS deployments in future activities.

The change from NAT gateway to NAT instance has an impact on our VPC configuration

VPC Changes

  1. We will use standard Terraform AWS resources code instead of a Terraform Module. Hence we’ll be using standard Terraform code to create a VPC.
  2. Also had to change the security group’s code from using Terraform Modules to using Terraform resource code and the methods of referencing AWS resources instead of modules.
  3. Terraform Outputs had to be changed as well to recognize the above changes

ELB changes

  1. We will use standard Terraform AWS resource code instead of the Terraform community module to create a classic load balancer.

Requirements

Note:

If you performed the previous exercise, you might be tempted to try and use the same VPC code. Unfortunately, we are using NAT instances instead of a NAT gateway. We require a new code to create this VPC. The other modules in this exercise are explicitly written with references to this type of VPC found below.

So let us get started

First, please create the following folder structure shown below.

VPC

The following code “vpc.tf”, “var.tf”, and “security_groups.tf” will be created and placed into the VPC folder.

The code below creates a VPC, two public subnets, two private subnets, two NAT instances (one for each public subnet), routing for the public subnets, and routing for the private subnets.

Create the VPC code file “VPC.tf”

Variables for VPC module (var.tf)

Security Groups (security_groups.tf)

Outputs for the VPC module (output.tf)

Code for Classic Load Balancer and Docker web servers (ELB-Web.tf)

The following code “elb-web.tf”, “var.tf”, and “bootstrap_docker.sh” will create an AWS classic load balancer, and four web servers (two in each public subnet). These files will need to be placed into a separate folder, as the code is written to be modular and to obtain data from Terraform Remote state output data. It literally will not work if placed into the same folder as the VPC code.

The load-balanced web servers will be running a docker container as a web server. If you want to test the load balancer, feel free to read up on How to use AWS route 53 to route traffic to an AWS ELB load balancer.

Variables for ELB-Web (variables.tf)

Bootstrap to install and run Docker container (file name “bootstrap_docker.sh”)

#!/bin/bash
sudo yum -y update
sudo amazon-linux-extras install -y docker
sudo usermod -a -G docker ec2-user
sudo systemctl start docker

sudo docker run -d --name mywebsite -p 80:80 surfingjoe/mywebsite:latest
hostnamectl set-hostname Docker-server

Controller

It is not required to even create the following code for the load-balanced web servers to work. But, because the VPC code is different from the previous exercise, I’m including the code for a jump server (aka bastion host, or as I call it a controller because I use the jump server to deploy ansible configurations on occasion). A jump server is also sometimes necessary to SSH into servers on a private network for analyzing failed deployments. It certainly comes in handy to have a jump server!

The following files will be placed into a separate folder, in this case, named “controller”. The files “controller.tf”, “variables.tf”, and “bootstratp_controller.sh” will create the jump server (Controller).

Once again this is modular code, and won’t work if these files are placed into the same folder as the VPC code. The code depends on output data being placed into Terraform remote state S3 bucket and this code references the output data as inputs to the controller code.

Create file “controller.tf”

Note; I have some code commented out in case you want the controller to be an UBUNTU server instead of an AMI Linux server. I’ve used both flavors over time and hence my module allows me to use choose at the time of deployment by manipulating which lines are commented.

Create the Variables file “variable.tf”

Create the bootstrap “bootstrap_controller.tf”

#!/bin/bash
sudo yum -y update

hostnamectl set-hostname Controller
sudo yum install unzip
sudo yum install -y awscli
sudo amazon-linux-extras list | grep ansible2
sudo amazon-linux-extras enable ansible2

Provisioning

  1. Be sure to change the S3 Bucket name in S3_policy.tf (lines 16 & 17), shown above in Red, into your S3 bucket name
  2. Be sure to change the test.tfvars in the VPC folder, variables of your choice
  3. Be sure to change the test.tfvars in the ELB-WEB folder, to variables of your choice
  4. Be sure to change the main.tf lines 11-13 with the configuration for your S3 bucket to store terraform backend state
  5. In your terminal, go to the VPC folder and execute the following commands:
    1. Terraform init
    2. terraform validate
    3. Terraform apply
  6. In your terminal, go to the elb-web folder and execute the following commands:
    1. Terraform init
    2. terraform validate
    3. Terraform apply

      That is it, we have launched and should now have a load-balanced static website with resilience across availability zones and within each zone have at least two web servers for high availability

If you want to actually test the load-balancer feel free to read up on How to use AWS route 53 to route traffic to an AWS ELB load balancer.

The controller (bastion host), can be launched at any time. Quite often, I’ll launch the controller to troubleshoot a test deployment.

It goes without saying, but it has to be said anyway. This is not for production!

All public websites should have some type of application firewall in between the Web Server and its internet connection!

All websites should have monitoring and a method to scrape log events to detect potential problems with the deployment.

It is a good idea to remove an EC2 instance or an ELB when you are finished with the exercise so as not to incur costs

Create AWS load-balanced website using a custom AMI image

Load balanced Website servers

Repository

All of the Terraform code for this exercise is in Github repository

Features

  • AWS as cloud provider
  • Compliant with Free Tier plan
  • The ability to provision resources into AWS using “modular code.”
  • Using a community module to create the VPC, public and private subnets
  • Four EC2 Web Servers behind a Classic load balancer
  • Ability to launch or destroy bastion host (jump server) only when needed
    • Can add/remove bastion host (jump server) at any time without impact to other resources (Bastion Hosts – Provides administrators SSH access to servers located in a private network)

Requirements

  • Must have an AWS account
  • Install AWS CLI, Configure AWS CLI, Install Terraform
  • AWS Administrator account or an account with the following permissions:
    • Privilege to create, read & write an S3 bucket
    • Privilege to create an IAM profile
    • Privilege to create VPC, subnets, and security groups
    • Privilege to create security groups
    • Privilege to create a load balancer, internet gateway, and NAT gateway
    • Privilege to create EC2 images and manage EC2 resources
    • Ec2 Key Pair for the region
  • Create an S3 Bucket for Terraform State
  • In the previous exercise, we created a web server that was configured with a static website. We will use that configuration (AMI ID), for this exercise. Use the previous exercise EC2 image, saved as an EC2 image (We will need the AMI ID of that image for this exercise).

Infrastructure

New Infrastructure

Dry Code (reusable and repeatable)

Dry code (the principle of “do not repeat yourself”) means creating lines of code once and using or referencing that code many times. The benefit to everyone is re-usable code. 

  • Someone writes a bit of code and puts the code in a shared location
  • This allows other team members to copy the code or make references to the code
  • Everyone uses the same code but varies the utilization of code with variables

In the case of AWS deployments with Terraform, referenced code applied to a test environment using variables will create smaller or fewer resources in a test environment. In contrast, the same code with variables would deploy a larger resource or a greater scale of resources in production.

It makes sense to test and validate code in a test environment, then deploy the same code in production using variables that change the parameters of deployment.

We can accomplish dry code in Terraform by placing the “Infrastructure as Code” in a shared location such as Git, GitHub, AWS S3 buckets, shared files on your network, or a folder structure on your workstation. Then using the shared code in different deployments simply by using environment variables.

independent and modular

Modular coding allows code to be deployed “independent” of other code. For example, the ability to launch and test security groups, load balancers, EC2 instances, or containers as deployment modules, with or without dependencies on other resources.

Consider a bastion host (I call it a “Controller” as I also use a bastion host to run Ansible code). Using modular code we can launch a jump server (bastion-host) using Terraform, do some administration using SSH into some private servers, and when finished, we can shut down the controller. Meanwhile, Infrastructure launched with other modular code remains operational and not impacted by our addition and subsequent removal of a bastion host.

The Secret ingredient to modular terraform (Outputs, Inputs)

Output/Input -Seriously, the secret to modular and reusable Terraform code is wrapping our heads around putting code into a folder and using code to output certain parameters from that code into a remote state. Then using the outputted parameters from the remote state; as parameter inputs. Hence, we are passing data between modules. For example, code to create a VPC will include an output of the “VPC – ID”, and other modules will know the VPC ID by essentially getting the ID from Terraforms “Output.”

Location, Location, Location – The other secret is to place the output in a location for other modules to use as input “data.”, for example placing a remote state into an S3 bucket.

Using AWS S3 bucket

The diagram above represents storing Terraform state in an AWS S3 bucket. Create a Terraform Output parameter, which is placed into Terraform’s state file. Another module then gets the data.

Say for example we create a VPC and use an output statement as follows;

output "vpc_id" {
  description = "Output VPC ID"
  value       = module.vpc.vpc_id
}

Another module will know what VPC to use by getting the data about the VPC ID;

vpc_id = data.terraform_remote_state.vpc.outputs.vpc_id 

So one module outputs the property value of an AWS resource using an Output statement with a name, in this case, “vpc_id”, another module gets the data of the AWS resource by getting the data from Terraform State referencing the Output name, in this case, “vpc_id”.


So let us get started

First, please create the following folder structure shown below.

After creating the folders, we will place code into each folder and then use “Terraform apply” a few times to demonstrate the independence of modular Terraform code.


Create VPC.tf (in the VPC folder)

Note: this code is using a community module for the creation of a VPC. See the registry of community modules at:
https://registry.terraform.io/namespaces/terraform-aws-modules.

I like the community-built module AWS VPC Terraform module because it can create a VPC with public and private subnets, an internet gateway, and a Nat gateway with just a few lines of code.

However, to my knowledge, it is not written or supported by Hashicorp. It is written and supported by antonbabenko. I’m sure it’s a great module, and I personally use it, but I don’t know enough about it to recommend it for production usage. I have done some rudimentary tests, it works great, makes it far easier to produce the VPC & subnets in my test account. But, treat this module like any other community or open-source code before using it in production and do your own research.

vpc.tf

Note: This will create a NAT gateway that is not free in AWS Free Tier; there will be a cost! For example: about a dollar per day in the US-West -1 region if left running.

Create variables.tf (in the VPC folder)

Note: No “default” settings for the following variables.

  • Region
  • Environment
  • Your_Name
  • ssh_location

When creating variables without a “default”, it will cause “terraform apply,” to ask for your input for each of the variables that do not have a default setting. This allows an admin to stipulate a region of choice upon execution. Giving a Tag and optional input allows us to tag a deployment as “Test” or Development”. Using a variable with no default for “My public IP address” I named in this exercise as SSH_Location, allows you to input your public IP address and not have the IP address embedded in code. Hence, we can deploy the same code into different regions and environments, simply by changing the input to variables.

Instead of inputting answers manually for the above variables every time the code is executed, a common practice would be to create an “answer file using “.tfvars”. For example, we can create a “test.tfvars” file and then use that answer file as part of the Terraform Apply command, where the command would be:
“Terraform apply -var-file=test.tfvars
And the file would look something like the following:

test.tfvars

your_name       = "Joe"
ssh_location    = "1.2.3.4/32"
environment     = "Test"
region         = "us-west-1"

Note: A benefit of putting your answers into a file like “test.tfvars”, is that you can protect your answers from the public. By adding “*.tfvars” into .gitignore. A .gitignore file will force git to ignore stated file patterns in the .gitignore when pushing files into Github, which assures your sensitive dat is not copied into Git or GitHub.

Create security_groups.tf (in vpc folder)

Create a security group for the controller in the same folder “VPC”.

“Output.tf” will be used as data for other modules to use as “Input” data
In example : (elb-tf folder).

Outputs

Outputs.tf

As shown above, the “outputs.tf” is providing output data for:
Region, vpc_id, controller-sg_id, public_subnet_ids, private_subnet_ids.

After applying “Terraform apply -var-file=tfvars”, you will see the above outputs displayed in the terminal console.


New Module and New Folder
Load Balancer and distributed Web Servers

We are going to provision the Elastic Load Balancer and Web Servers from a different folder. A separate folder automatically becomes a module to Terraform. This module is isolated, and we can provision using this module from another workstation or even using a different privileged IAM user within an AWS account.

If you want to actually test the load-balancer feel free to read up on How to use AWS route 53 to route traffic to an AWS ELB load balancer.

Create a new folder “elb-web” cd into the directory and let’s get started.

elb-web.tf

So we begin making statements, AWS is the cloud platform, and Hashicorp AWS is the module provider. Then stipulate an S3 bucket as the remote state and acquire our first “data input, from the S3 bucket, ” which is “data.terraform_remote_state.vpc.outputs.” and acquire the “Name” another input from the remote state, “aws_region”.

Inputs

elb-web.tf – continued

The code above uses another community module. In this case, the “Elastic Load Balancer (ELB) Terraform module“. This module was also written and supported by antonbabenko.

elb-web.tf – continued

“Count” is a resource configuration that tells Terraform how many EC2 instances to create, and the length tells how many subnets to place the count of instances. In this case, we have two private subnets, so the “count” configuration will place two instances of the EC2 AMI into the two private subnets.

Note: once again, we are using “remote state” to obtain the private subnet information from the VPC module by using outputs placed into Terraform remote state S3 bucket by using “data_remote_state” to get the data for private subnets. .

variables.tf (for elb-web folder)

test.tfvars

your_name       = "Your Name"
ssh_location    = "1.2.3.4/32"
environment     = "Test"
key             = "Your EC2 key pair"

New Module and New Folder
Controller

Create and cd into a directory named “controller”. We will create three files: controller.tf, s3_policy.tf, and variables.tf

controller.tf

Note: We do not have to create or launch the controller for the load-balanced website to work. The controller (jump server) is handy if you want to SSH into one of the private servers for maintenance or troubleshooting. You don’t really need it, until you need it. hehe!


s3_policy.tf

The S3 policy is not required for a Jump Server. We might need some files for common maintenance of server configuration using Ansible. I like to place these files into an S3 bucket such that Ansible playbooks can be applied to multiple servers. An S3 policy allows our Jump server (controller) access to an S3 bucket

variables.tf


Provisioning

  1. Be sure to change the S3 Bucket name in S3_policy.tf (lines 16 & 17), shown above in Red, into your S3 bucket name
  2. Be sure to change the test.tfvars in the VPC folder, variables of your choice
  3. Be sure to change the test.tfvars in the ELB-WEB folder, to variables of your choice
  4. Be sure to change the main.tf lines 11-13 with the configuration for your S3 bucket to store terraform backend state
  5. In your terminal, go to the VPC folder and execute the following commands:
    1. Terraform init
    2. terraform validate
    3. Terraform apply -var-file=test.tfvars
  6. In your terminal, go to the elb-web folder and execute the following commands:
    1. Terraform init
    2. terraform validate
    3. Terraform apply -var-file=test.tfvars

      That is it, we have launched and should now have a load-balanced static website with resilience across availability zones and within each zone have at least two web servers for high availability

The controller (bastion host), can be launched at any time. Quite often, I’ll launch the controller to troubleshoot a test deployment.

It goes without saying, but it has to be said anyway. This is not for production!

All public websites should have some type of application firewall in between the Web Server and its internet connection!

All websites should have monitoring and a method to scrape log events to detect potential problems with the deployment.

It is a good idea to remove an EC2 instance, or and ELB, when you are finished with the exercise, so as not to incur costs

Create an S3 bucket using AWS CLI

To create a bucket, you must register an account on Amazon Web Services and have a valid AWS Access Key ID to authenticate requests.

Creating an S3 bucket can be accomplished in several ways:

  • My Choice – Install AWS CLI on your desktop or laptop.
  • Use AWS cloud 9 – AWS Cloud9 is free for new accounts using the Free Tier option.
  • Use a virtual machine locally, then install AWS CLI on the virtual machine.
    • For Windows – Virtual Box, VMware Workstation, or VMWare Player.
    • For MAC, you can use Virtual Box, VMware Fusion, or Parallels desktop
    • For Linux, use Virtual Box or VMware Workstation Player
    • Use a Docker Container and run CLI from the container

Not every string is an acceptable bucket name. For information about bucket naming restrictions. See Bucket naming rules

Install and configure AWS CLI

AWS CLI version 2 installation instructions:

Note: the above instructions are links to AWS documentation. I’m planning on writing up the use of Packer for Docker and Vagrant for virtual machines, along with Ansible configurations, as future posts.

Create a Bucket

Before executing the following command, you must configure the AWS CLI

When you have configured your AWS CLI environment, you should be able to run the following command.

AWS s3 mb s3://bucket-name

Terraform – Very basic AWS website

New VPC, Public Subnet & a Web Site

Requirements & installation of Terraform

The following must be installed and configured for this exercise:

Install AWS CLI

Configure AWS CLI

Install Terraform

Note:  You don't have to install these requirements into your desktop.  It is certainly quite feasible to use a virtual desktop for your development environment using tools like Oracle's virtualbox or VMware Workstation or Player, or Mac Fusion or Mac Parallels.  Perhaps an AWS Workspace or AWS Cloud 9 environment. 

We’ll create a very simple website using Terraform. It’s not really good from a production perspective, except to give a rudimentary and easy to read example of provisioning infrastructure and a website using Terraform.

I have placed all of the code in a GitHub, if you are not into typing all of the code. Her is the link: One_Public_Subnet_Basic_Web_Server

First setup a new folder. You can either use GIT to clone the code from GitHub or type in create your own files as show below:

VPC.tf

This file will create a VPC, we’ll give it a name, mark it as a “Test” environment and create one public Subnet and an Internet Gateway so that we can get Internet traffic in and out of our new AWS network.

So first a bit of code to create the VPC

resource "aws_vpc" "my-vpc" {
  cidr_block           = var.vpc_cidr
  enable_dns_support   = true
  enable_dns_hostnames = true
  tags = {
    Name  = "My VPC"
    Stage = "Test"
  }
}

It states that it is an AWS_VPC, then we provide the VPC IP address range.

A resource block declares a resource of a given type (“aws_vpc”) with a given local name (“my-vpc”). The name is used to refer to this resource from elsewhere in Terraform coding.
The resource type and name together serve as an identifier for a given resource and so must be unique within a module.
Within the block body (between { and }) are the configuration arguments for the resource itself. Most arguments in this section depend on the resource type.

Add a few Tags to most of your terraform resources, it is an excellent way of tracking AWS infrastructure and resources. Not really a big deal if this was to be the only VPC and a few resources. However “TAGS” become really important as an organization might have multiple test environments, multiple Development and QA environments and multiple production environments. By setting tags we can keep track of each project, the type of environment and recognizable names for the many systems. So a standard practice of adding meaningful tags, is a really good idea!

A bit of code to create an Internet Gateway

resource "aws_internet_gateway" "my-igw" {
  vpc_id = aws_vpc.my-vpc.id
  tags = {
    Name = "My IGW"
  }
}

We are coding a resource as a “aws_internet_gateway” and the reference name of “my-igw”. You can provide any name you wish to use. Just know that if you are going to make a reference to the internet gateway in any other terraform code, you must use the exact same name (referenced names are case sensitive and symbols like dash versus underscore sensitive).

ADD One public Subnet

resource "aws_subnet" "public-1" {
  vpc_id                  = aws_vpc.my-vpc.id
  map_public_ip_on_launch = true
  availability_zone       = var.public_availability_zone
  cidr_block              = var.public_subnet_cidr

  tags = {
    Name  = "Public-Subnet-1"
    Stage ="Test"
  }
}

Add route to internet gateway

resource "aws_route_table" "public-route" {
  vpc_id = aws_vpc.my-vpc.id

  route {
    cidr_block = "0.0.0.0/0"
    gateway_id = aws_internet_gateway.my-igw.id
  }
  tags = {
    Name = "Public-Route"
  }
}

Associate the route to Internet Gateway to the public subnet

resource "aws_route_table_association" "public-1-assoc" {
  subnet_id      = aws_subnet.public-1.id
  route_table_id = aws_route_table.public-route.id
}

That completes the VPC.TF file


Variables.tf

The variables file for Terraform can actually have almost any name, names like vars.tf, my-vars.tf, my-variables.tf. You can even embed the variables within the VPC.TF file if you so desire, so long as the variables are declared in a file within the same folder. The most important element to learn is not just about the variables, but keeping sensitive variable data secure. Sensitive data should go into a file like “tvars.data”. And add “tvars.data” into the .gitignore file so that our sensitive variables doesn’t get posted in public github repository. Additionally, Hashicorp has a product offering called “Vault”. If multiple personnel are using the same Test, Development, QA or production environment, it is a recommended practice to protect sensitive variable data like AWS credentials, AWS Key names, and other sensitive data!

This is a very basic, non-production example with no sensitive data, so in this case we can create a variables.tf file without worry about keeping any data safe.

variable "region" {
    type=string
    description="AWS region for placement of VPC"
    default="us-west-1"
}

variable "vpc_cidr" {
    type=string
    default="10.0.0.0/16"
}

variable "public_subnet_cidr" {
    type=string
    default="10.0.1.0/24"
}

variable "public_availability_zone"{
    type = string
    default="us-west-1a"
}

variable "instance_type" {
    type = string
    default = "t2.micro"
}

That completes the variables file


Main.tf

Once again the name the name of the file is not important. We could call it MyWeb.tf or Web.tf. We could even put the VPC code, the variables code and the Web code, (all of the code), into one big file. Breaking up the code into separate files, just makes it modular coding that is reusable and easier to review.

provider "aws" { region = var.region}

Notice we are declaring the AWS Region in this block of code. WHAT? Shouldn’t this be declared when we created the VPC itself? Again, as long as it is declared, it almost doesn’t matter which file you place the declaration of AWS Region.

Notice also in this short bit of code:

We are stating the provider as “AWS”, this tells Terraform the backend code that will be downloaded from Hashicorp repositories in support of this instance of Terraform provisioning. It might also be a good idea to include the release of Terraform as a requirement within the code. Over time, Hashicorp changes and deprecated elements of Terraform. Such that over time, your code may no longer work if you pull down the “latest Terraform backend” from Hashicorp repositories.

Versioning Terraform Code

Code similar to the following might be a good idea:

terraform {required_version = ">= 1.04, < 1.05"}

This stipulates the use of Terraform version “1.04”, which is a representation of the version utilized when the code was tested and released. Future versions of Terraform may not work because of deprecation, but this version for sure works because it was tested using Terraform version 1.04.

I have not included this statement in my code, because after all, it is simply an example, not coding for any project or production system. We shall see if over time, something changes and it no longer works 🙂

Using SSM parameter to obtain AMI ID

data "aws_ssm_parameter" "ubuntu-focal" {
  name = "/aws/service/canonical/ubuntu/server/20.04/stable/current/amd64/hvm/ebs-gp2/ami-id"
}

You will see a tremendous amount of “Infrastructure as Code” declaring the AWS Image ID to use for an EC2 resource as something like ami-0d382e80be7ffdae5 for example. Sometimes it is hardcoded into the “aws_instance” block, or most times you’ll see it declared as a variable.

Sometimes a “Infrastructure as Code” creates a mapping (a list) of images where one of the images can be used dependent on the region. I’ve seen code where literally an AMI-ID is listed for each AWS region across the globe. Not unlike a phone book listing. This type of approach is used in Terraform, Cloudformation, Ansible, Chef and Puppet, most anywhere with provisioning with Infrastructure as Code.

This type of mapping of an ID per region, might be required. If for example, creating a custom “Golden Image”. It is not unusual to create and release an AMI ID as the gold standard to use for a deployment. The “Golden Image” is pre-configured with a specific version of Python, Apache or NGINX for example. The custom image is then stored as an EC2 AMI in AWS. To use as the AMI ID for a specific project(s) and you’ll need a different image ID depending on the region.

I have already created and will be posting in the near future, examples of scalable web servers. Using a custom AMI image with specific versions of Python, Apache2 and another AMI for MySQL backends. In those examples, I will be using a specific “golden image” with versioning and release statements.

For now though, I just need the latest version of Ubuntu server. You can see a good write up on how to pull a specific Ubuntu image. You’ll find the document by Ubuntu, at this link: Finding-ubuntu-images-with-the-aws-ssm-parameter-store.

This method is a Terraform code that connects into AWS API to “Get Data”. In this case an aws_ssm_parameter. And specifically in this case getting an image for Ubuntu server 20.04 stable release.

This bit of code will get the AMI ID, for the AWS Region specified earlier.

I could’ve just as easily have gotten an Amazon Linux 2 AMI ID as follows:

data "aws_ssm_parameter" "linuxAmi" {
  name     = "/aws/service/ami-amazon-linux-latest/amzn2-ami-hvm-x86_64-gp2"
}

Caution: Do not use an Amazon Linux example above because the bootstrap.sh, User Data (see below) is specifically using Ubuntu server commands language . Make sure to sure to use the UBUNTU SSM Parameter above. I am simply demonstrating that you can get other Linux kernels, using the same process.

Creating the aws_instance

resource "aws_instance" "web" {
  ami                    = data.aws_ssm_parameter.ubuntu-focal.value
  instance_type          = var.instance_type
  subnet_id              = aws_subnet.public-1.id
  vpc_security_group_ids = ["${aws_security_group.web.id}"]
  user_data = file("bootstrap.sh")
  tags = {
    Name  = "Basic-Web-Server"
    Stage = "Test"
  }
}

Now we are calling for the creation of an AWS Instance with the name “web”

In the AWS resource block, we’ll need to stipulate at the very least an AMI-Id, the instance type, the subnet placement and a security group.

In this case we are using the AMI-Id pulled earlier. ami=data.aws_ssm_parameter.ubuntu_focal.value. Where “ubuntu_focal” is referencing the bit of code that pulls the code from AWS.

 data "aws_ssm_parameter" "ubuntu-focal" (this pulls the AMI-ID data from AWS - line 8 of this code)
 ami= data.aws_ssm_parameter.ubuntu-focal.value (this uses the AMI-ID Value that was pulled from AWS in line 8)

The instance type will be a t2.micro (free tier) referenced in the variables.tf file. The subnet references the subnet created in VPC.tf that is named “public-1”. The security group is referencing the security group created in “security_groups.tf” (see the next section below).

User Data

User data is a bit of code that executes within the AWS Instance itself. In this case, code the Web server executes when it is first built by Terraform provisioning. There is a number of ways to write this script which executes when the AMI instance is launched. We could write the script like this:

  user_data              = <<-EOF
                            #!/bin/bash
                            apt update
                            apt upgrade -y
                            hostnamectl set-hostname Web                            
                            EOF

Or we can put the script into a file and call the file itself like this:

user_data = file("bootstrap.sh")

For this example we are using the “bootstrap.sh” example. Technically we can use any name, so long as the script itself is properly coded. We could use “boot.sh” for example.

Add some tags and we are near complete with this file.

The final lines, is an instruction for Terraform to output AWS data. The Terraform code use the AWS API to pull data about our new Web server and display that data in the terminal when Terraform completes provisioning our infrastructure. In this case we want only the public IP

output "web" {  value = [aws_instance.web.public_ip] }

Note: If you leave off the last bit, “public_ip” the output will display all of the known data about the new web server. However, as can be seen in future examples, being specific about output data makes it referenceable in other Terraform modules. So in this case we want the public_IP.

That completes the Main.tf file


Lastly, Create the security_groups.tf file

Security groups resource “aws_security_group” at the very least requires a name, in this case “web-sg”, the vpc_id and an ingress rule and egress rule. Once again, about the Name of the resource, it is important to remember, that referencing the security group the name itself is case sensitive and it symbol sensitive like dash instead of underscore.

resource "aws_security_group" "web-sg" {
  vpc_id      = aws_vpc.my-vpc.id
  description = "Allows HTTP"

  ingress {
    from_port   = 80
    to_port     = 80
    protocol    = "tcp"
    cidr_blocks = ["0.0.0.0/0"]
  }
  egress {
    from_port   = 0
    to_port     = 0
    protocol    = -1
    cidr_blocks = ["0.0.0.0/0"]
  }
  tags = {
    name  = "SecurityGroup-Web"
    Stage = "Test"
  }
}

Configuration

Note: The variables do not have to be changed if you are ok with running a new VPC and Web server out of US-West-1 region

Once the requirements stated above are installed, and the VPC.tf, main.tf, security_groups.tf and variables.tf are created in the same folder you are ready to launch. Or, you can simply clone the GITHUB repository into a folder.

  • Edit the variable for your choice for AWS Region (currently, the default is “us-west-1”).
  • Edit the CIDR blocks if you want to use different address range for your new VPC
  • Edit the Instance type if you want to use a different instance type (note t2.micro is the only one you can use for free tier)

Launching the VPC and Web Server

After installing the requisite software, requisite files and configured the variables.

Run the following commands in terminal

  • Terraform init
    • Causes terraform to install the necessary provider modules, in this case to support AWS provisioning
  • Terraform validate
    • Validates the AWS provisioning code
  • Terraform Apply
    • Performs the AWS provisioning of VPC and Web Server

After Terraform finishes provisioning the new VPC, Security Group and Web Server, it will output the Public IP address of the new public server in the terminal Window


Open a browser and you should see the welcome to nginx as shown below:


Clean up

Once you have finished with this example run the following command:

  • Terraform Destroy (to remove VPC and Web Server)

It goes without saying, but it has to be said anyway. This is not for production!

All public websites should have some type of application firewall in between the Web Server and its internet connection!

It is a good idea to remove an EC2 instance when you are finished with the instance, so as not to incur costs for leaving an EC2 running.


Using AWS CLI to create a static WebSite on S3

To create a bucket, you must register with Amazon S3 and have a valid AWS Access Key ID to authenticate requests. By creating the bucket, you become the bucket owner.

Not every string is an acceptable bucket name. For information about bucket naming restrictions. See Bucket naming rules

Step 1 – Choose where you want to run AWS Command Line Interface (CLI)

There are several methods to using AWS CLI

  1. My Choice – Install prerequisite utilities and AWS CLI on your desktop or laptop.
  2. An alternate method – Use AWS Cloud9. An EC2 instance is created and configured by the AWS Cloud9 service. Cloud9 configuration of an EC2 instance comes with the prerequisite utilities and AWS CLI already configured for use within your AWS account. Cloud9 may require enabling the AWS Toolkit in Cloud9 to manage some services. The welcome screen discusses why and how to use the toolkit). AWS Cloud9 is free to use for new accounts using the Free Tier option.
  3. Another method – Create a virtual machine locally, then install the prerequisite utilities and AWS CLI installed into the virtual machine.
    • For Windows machines – Virtual Box, VMware Workstation, or VMWare Player.
    • For Mac’s you can use Virtual Box, VMware Fusion or Parallels desktop
    • For Linux machines use Virtual Box or VMware Workstation Player
  4. Another method – Use a Docker Container and run CLI from the container
  5. Another tool to possibly use is Dockers Dev Environment which at the time of this writing is in Preview Mode, I haven’t tried the preview yet.

Note: A fun activity is using Hashicorp/Vagrant to automate the installation and configuration of virtual machines. Creating a standard Dev. Environment amongst developers. By using Vagrant the vagrant file (script) creates and configures a virtual machine exactly the same way on Macs, Windows and Linux machines, using Vagrant and Virtualbox. Thus, assuring everyone is using the same version of Python for example! Vagrant does work with VMware Workstation or VMware fusion (at cost).

Note2: Another fun activity is using HashiCorp/Packer to create and create a standard Docker Image for developers to use as a standard docker image. Like Vagrant, Packer scripts the creation of an image, and the installation of specific versions of the requisite utilities for AWS CLI. An example, is to use these specific version of AWS CLI and Python (aws-cli/2.1.29, Python/3.7.3) when creating and configuring a docker image.

Note3: Both Vagrant and Packer use "provisioners", a built in command to configure a virtual machine or docker image. I personally like to use Hashicorp/Ansible for the configuration, in my opinion Ansible is more intuitive, easier to use, more immutable and declarative as a configuration tool.

The primary difference between Vagrant and Packer, is that Vagrant creates a Virtual Machine, whereas Packer creates a Docker image. A Virtual Machine can perpetually save all of the local files by simply suspending a virtual machine when finished for the day, whereas Docker images needs to map to a local directory for persistent storage. I like using a virtual machine (possibly even with shared folders), but that is my old school methods getting in the way perhaps 🙂


The Difference in the alternatives above

The primary difference between installing AWS CLI on your desktop or laptop or using one of the alternative methods above is all about controlling your utility versions. An Example, two members of a team, use AWS CLI installed on their desktops. Team member “Tom Jones” is running AWS CLI Version 1 with Python Version 2.7, and member “John Thomas” is running AWS CLI Version 2 with Python Version 3.8. Different versions behave differently, what Tom can or can’t accomplish, most likely will be a different experience than John’s.

Cloud 9, Virtual Machines, or Docker Images, can and should have specific versions of utilities maintained by agreement amongst members of the team. Everyone will be able to accomplish the same tasks, share the same git repositories, etc., with the assurance of the same experience and outcomes.

Step 2 – Install and configure AWS CLI

This topic provides links to information about how to install, update, and uninstall version 2 of the AWS Command Line Interface (AWS CLI) on the supported operating systems.

AWS CLI version 2 installation instructions:

Note: the above instructions are links to AWS documentation. I’m planning on writing up the use of Packer for Docker and Vagrant for virtual machines along with Ansible configurations, as future posts.

Step 3 – Create a Bucket

When you have configured your AWS CLI environment, you should be able to run the following command.

aws s3 mb s3://bucket-name

Step 4 – Enable the bucket as a static website

aws s3 website s3://bucket-name/ –index-document index.html –error-document error.html

Step 5 – Apply the policy to the new bucket

Create a new local file “bucket_policy.json” with this content:

{
    "Version": "2012-10-17",
    "Statement": [
        {
            "Sid": "PublicReadGetObject",
            "Effect": "Allow",
            "Principal": "*",
            "Action": "s3:GetObject",
            "Resource": "arn:aws:s3:::bucket_name/*"
        }
    ]
}

Make sure to replace the bucket_name in the above content with your new S3 bucket name

Execute the following command in your command-line interface (CLI)

aws s3api put-bucket-policy –bucket bucket-name –policy file://./bucket_policy.json

Step 6 – Create the index.html and error.html files

Create an index.html file. If you don’t have an index.html file, you can use the following HTML to create one (using any text editor):

Save the index file locally. The index document file name is case-sensitive. For example, index.html and not Index.html.

To configure an error document Create an error document, for example, error.html (using any text editor):

Save the error document file locally. Remember, The file name is case sensitive

Step 7 – Copy the files into your S3 bucket

aws s3 cp index.html s3://bucket-name
aws s3 cp error.html s3://bucket-name

S3 static WebSite should be operational

The website will be at the following address:

bucket-name.s3-website.your-aws-region.amazonaws.com

Create a Web Server using an EC2 Instance


Connect into your EC2 instance:
Goto Amazon’s EC2 connect guide as they have a great documentation on your choices of how to connect into an EC2 instance.

Install Apache Service and start the service

Configure your own HTML page


Assuming that the HTTP & HTTPS security group has already been created, it needs to be assigned to this EC2 Instance

  • Goto the AWS EC2 dashboard
  • Click on Instances Running in the Resources section
  • Select the EC2 Instance and then Click Actions button
  • Within the drop down menu choose to expand Security
  • Select Change Security Groups
  • In the Associated Security Groups, click in the “Select security groups” box
    Note: I don’t understand why the User Interface (UI) shows the “Select security groups” as though it is greyed out, but there you have it, click in that box, and a drop down of available security groups will be shown
  • If you followed the module Create HTTP and HTTPS security Group you should have a security group named “HTTP & HTTPS”, select the HTTPS & HTTPS security group and the box will change to the actual ID of the security group ID
  • Then click Add Security Group
  • Then click Save

Open a browser window and enter the URL to access the Web Server (it is the public IP address of the EC2 instance).

Note: get the public IP address from the EC2 Management console Instance details

You should see the following:


Caution: It is a good idea to remove an EC2 instance when you are finished with the instance, so as not to incur costs for leaving an EC2 running.

It goes without saying, but it has to be said anyway. This is not for production!

All public websites should have some type of application firewall in between the Web Server and its internet connection!

As well it should be monitored and have event and incident management in place. The list of things that will make a better architecture for a web site continues! However, enough said at this time!

Exit mobile version
%%footer%%