
- Create an AWS Free Tier Account
- Launch an EC2 instance Launching an EC2 Instance
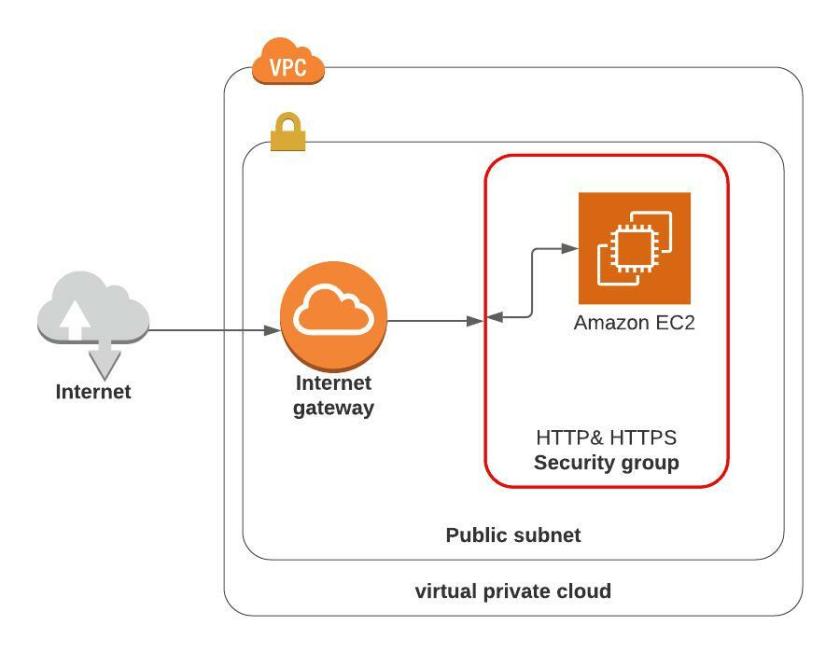
- Be sure to create the security groups
Connect into your EC2 instance:
Goto Amazon’s EC2 connect guide as they have a great documentation on your choices of how to connect into an EC2 instance.
Install Apache Service and start the service
Configure your own HTML page
Assuming that the HTTP & HTTPS security group has already been created, it needs to be assigned to this EC2 Instance
- Goto the AWS EC2 dashboard
- Click on Instances Running in the Resources section
- Select the EC2 Instance and then Click Actions button
- Within the drop down menu choose to expand Security
- Select Change Security Groups
- In the Associated Security Groups, click in the “Select security groups” box
Note: I don’t understand why the User Interface (UI) shows the “Select security groups” as though it is greyed out, but there you have it, click in that box, and a drop down of available security groups will be shown - If you followed the module Create HTTP and HTTPS security Group you should have a security group named “HTTP & HTTPS”, select the HTTPS & HTTPS security group and the box will change to the actual ID of the security group ID
- Then click Add Security Group
- Then click Save
Open a browser window and enter the URL to access the Web Server (it is the public IP address of the EC2 instance).
Note: get the public IP address from the EC2 Management console Instance details
You should see the following:


Caution: It is a good idea to remove an EC2 instance when you are finished with the instance, so as not to incur costs for leaving an EC2 running.


It goes without saying, but it has to be said anyway. This is not for production!
All public websites should have some type of application firewall in between the Web Server and its internet connection!
As well it should be monitored and have event and incident management in place. The list of things that will make a better architecture for a web site continues! However, enough said at this time!
